WordPress Tutorial – Displaying Instagram Photos On WordPress Site
Images can get more people to read your blog or visit your website. In this article, we’re going to discuss how you can take your Instagram photos and show it on your WordPress website or blog. It’s a great way to show off your best looking photos or show the visual side of your blog’s topic and increase your Instagram followers at the same time because you are giving your audience a preview of what they will see when they follow you. So, how do you go about displaying Instagram photos on WordPress site or blog? A simple plugin called Instagram Feed will help you get the job done without any coding required.

Displaying Instagram Photos On WordPress Site Using Instagram Feed Plugin
Step 1
First, if you have a private Instagram account, then you will not be able to display your feeds. If you don’t want to set it to public, then you can create a new public account made for your blog. In this way, you can keep private photos of you and your family separate from photos meant for blog-related topics. Then, you can install Instagram Feed plugin on your WordPress site. After installing the plugin, you will see the “Instagram Feed” button on your WordPress left panel menu. Click on this to go to the plugin’s controls.
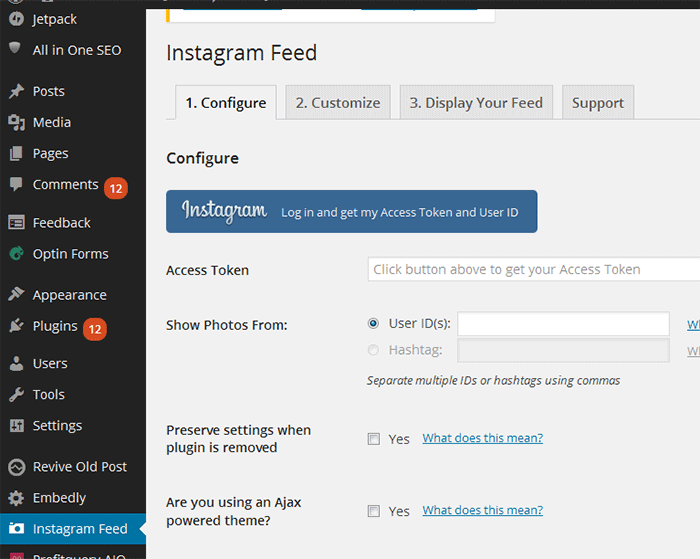
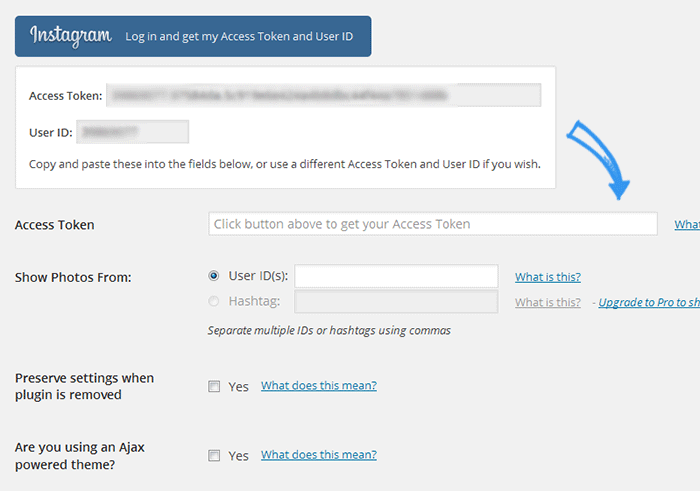
And you need to log in to your Instagram account and authorize the plugin to access your photos. Click on the blue button that says “Log in and get my Access Token and User ID”. If you’re not already logged in to Instagram, log in with user name and password. Authorize the plugin when prompted. Once done, it will bring you back to the plugin page in WordPress with your access token and user ID already generated. Copy these and paste it in the Access Token and User ID field below. After that, Click on Save Changes.
Step 2
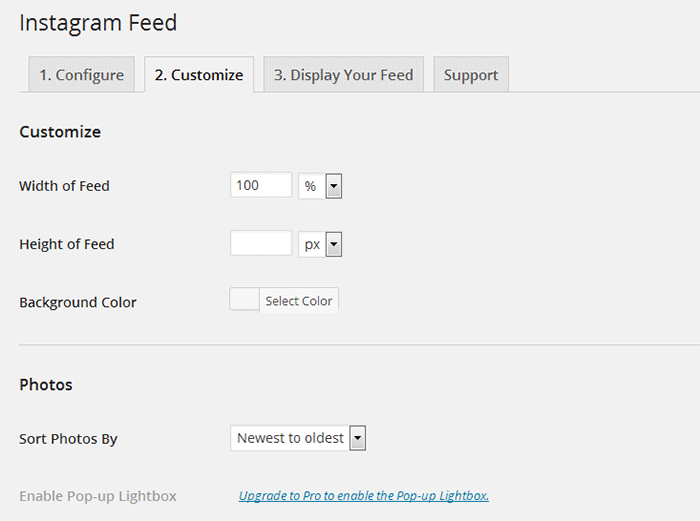
On the top portion, click on the Customize tab. Here you can customize the width and height of the feed area. If you’re going to place the feed on a sidebar widget, it’s best to check the dimensions of your widget area to match the values here. You can set the value by percentage or pixels. You can also select a background color to match your theme.
Step 3
Next, decide how many photos you want to show and in how many columns.
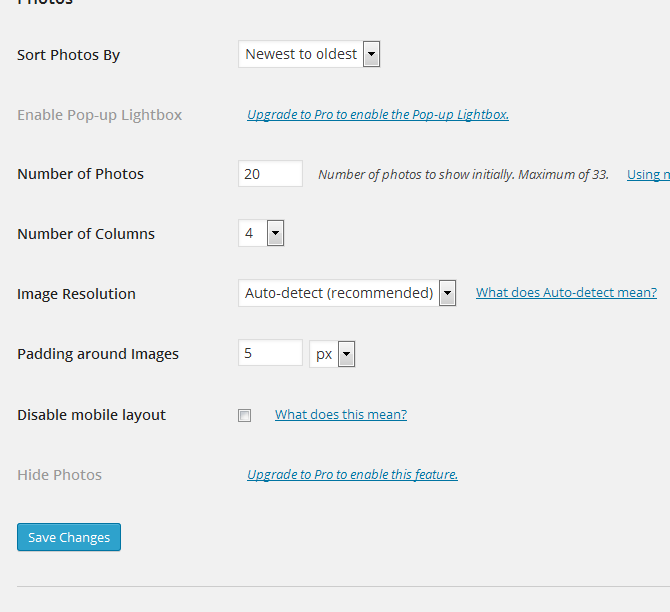
In image resolution, you can choose what size the photos appear in. There is a default of auto-detect which is recommended by the plugin. Lastly, you can change the padding around images, or the spacing between each image. The default is 5 pixels. You can also disable mobile layout. However, if you want the feed to appear responsively in a mobile device, keep this box unchecked. When done, click Save Changes.
Step 4
Further down, you have more options for the header, Follow and Load More buttons. On each of these areas, you can customize the background color and text color of buttons, as well as the text (default is “Load More” and “Follow on Instagram”). Once you’re done with customization, click on Save Changes and proceed to the next tab which is Display Your Feed.
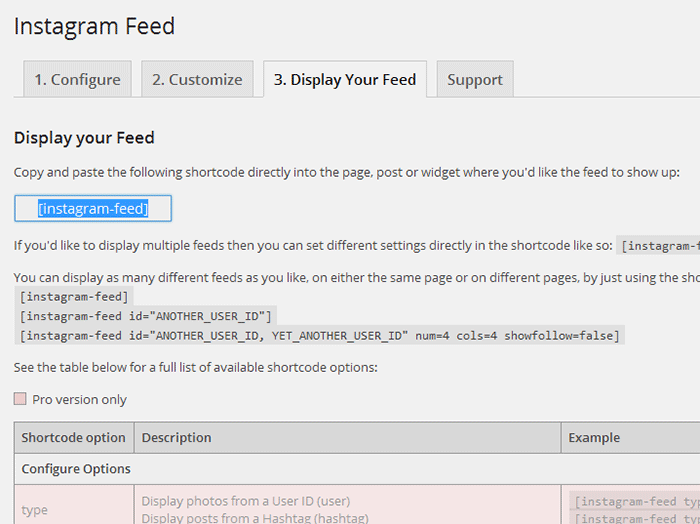
Here, you are given the basic short code to display your feed in any part of your site. Simply paste the short code to a text editor or widget text element and it should display the feed accordingly. There are other short codes you can use for added customizations, in case you want to display your feed differently in other areas of your blog. Note that some short codes, like displaying hashtags instead of user photos, come with the Pro version of the plugin.
You can display multiple users in one feed as describe in the short code example below:
[instagram-feed id="ANOTHER_USER_ID, YET_ANOTHER_USER_ID" num=4 cols=4 showfollow=false]
Note: The Instagram user ID required is not the same as the user name. Note that the user needs to have a public account for the photos to show. To get the user ID of an Instagram user, you can use Jelled.
The Output
Here’s an example of what your Instagram feed might look like:

Good luck!
